Vacation time means administration time. I am one of these Uberspace customers whose domain has been registered and managed not by an external DNS registrar but by Uberspace (or Jonas Pasche) itself. Since a few years Uberspace has not been providing this service. Actually this was not a problem and everything worked fine. The reason why I had to deal with it was, that I originally wanted to enable Let’s Encrypt for www.schakko.de – for obvious reasons. My space is still hosted on a older Uberspace server running CentOS 5, not having Let’s Encrypt integration. To use LE I had to move to a newer Uberspace server and just point my DNS records to the new host’s IPv4/IPv6.
This was the point were I thought about asking the Ubernauten to just change the DNS registration and everything would have been good. But to be honest I did not want the Ubernauten to follow some no longer supported procedures. I am still a developer and do exactly know how upsetting this can be. So I thought about alternatives and decided to go with AWS Route 53. This is by all means not the cheapest solution but for my future private projects I am planning to use AWS so this did fit best.
Prepararing the current DNS entries
Route 53 requires that the contact information for the domain registrant (= domain owner or “Domaininhaber” in denic-Sprech) must contain a valid e-mail address. This address is later used for the verification of the domain ownership. As I could not edit the information I asked the Uberspace admins to change the e-mail address. Just some information you might find useful:
- Contact information can be hidden to protect the privacy of the owner. This includes the e-mail address of the domain registrant.
- denic.de’s whois service does not show that these information is hidden because of privacy protection.
- denic.de’s field last update (“Letzte Aktualisierung” in German) does not get updated when the e-mail address is updated.
The two last bullet points highly irritated me as I thought nothing had changed. Nevertheless I started the domain transfer after having waited for two days.
Setting up the hosted zone
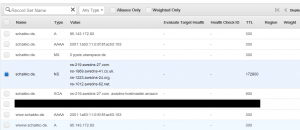
In AWS’ Route 53 administration panel you need to go to Hosted zones and click Create Hosted Zone. The following record sets have to be created:
| Name | Type | Value | Description |
|---|---|---|---|
| empty | A | IPv4 address of your host | see Uberspace datasheet |
| empty | AAAA | IPv6 address of your host | see Uberspace datasheet |
| empty | MX | 0 xyz.uberspace.de | xyz is your current Uberspace host. Do not forget the leading 0! |
| www | A | IPv4 address of your host | see Uberspace datasheet |
| www | AAAA | IPv6 address | see Uberspace datasheet |
Transferring the domain from Uberspace to Route 53
- Log in into your AWS account and select Route 53
- Go to Registered Domain > Transfer Domain
- After having entered the domain name and selected the TLD you have to provide the Authorization code. This has been entered by the Uberspace guys in my ~/authcode file.
For the name server options you can either select Continue to use name servers provided by the current registrar or DNS service or Import name servers from a Route 53 hosted zone that has the same name as the domain. I mistakenly used the first option (see below), you should go with the second option. Route 53 replaces the current NS entries with the previously created zone. - After clicking on Continue you have provide your contact information and make sure the checkbox Hide contact information if the TLD registry, and the registrar, allow it is checked.
A few minutes after you have purchased the domain, you will receive two e-mails:
- Final transfer status from domainnameverification.net
- Transferring to Route 53 succeeded from AWS
All in all it took no longer than 10 minutes. Fun fact: I did not receive an e-mail with a verification link. Providing the authcode seems to be sufficient.
Changing the nameservers in Route 53
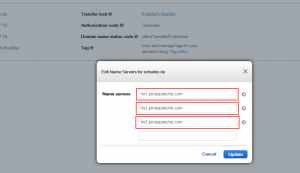
As I have already written, I mistakenly let the nameservers of my domain pointed to nsX.jonaspasche.com. To change the NS entries you just have to to got Registered domains > $YOUR_DOMAIN > Add or edit name servers.
Replace the entries with the NS entries from your hosted zone (xyz.awsdns-xyz.net etc).
Please note that updating the NS entries takes some time. The TTL for jonaspasche.com has been set to 3600 seconds so I had to wait around 1 hour that all my changes have been propagated.


